
Few things will have you pulling out your hair like a broken water heater. Aside from the inconvenience of not having running hot water, you are also saddled with the cost of getting a new heater and paying a professional to do it. Not to mention, the latter inflates your expenses by several hundred ringgit!
Installing a water heater by yourself can be an effective way to cut back on costs and restore your hot water supply. However, it is important to make sure that you understand the process before you try it.
In this article, we go through a step-by-step guide on how to install water heater, the tools you will need, and water heater replacement recommendations for your project.
Let’s begin, shall we?

Ultimate Guide on How to Replace a Water Heater
Tools and Materials You Might Need
Tools
- Tube cutters
- Channel-lock pliers
- Assorted screwdrivers
- A soldering tool
- A wrench
- A garden hose
Materials
- New water heater with all original fittings
- Electric connectors
- Plastic-lined nipples
- Flexible connecting tubes
- Plumber’s tape
- Cleaning cloth
Tell-tale Signs That it is Time to Replace Your Water Heater
A water heater typically lasts 8 to 10 years with good care. Unfortunately this is not always the case. Like all other appliances, water heaters are subject to wear and tear and it is safer to replace them when they begin to malfunction.
You will know that it is time to replace your water heater when:
You Are Trying to Make Your Home Energy-efficient
Old appliances like an ancient water heater, are often not designed with power-saving mechanisms. As such, if you are committed to lowering your energy consumption, consider upgrading to something more modern with a higher energy efficiency rating.
You Notice Water Leaking
If there is water dripping from your water heater tank to the floor, it likely means that the tank has cracks. Sometimes this may also show up as streaks of rusty water on the tank. This should tell you that the tank has not only cracked but its metal elements are getting corroded. That would be your queue to start shopping for a replacement. Even if you know how to clean a water heater, a cracked tank usually means it’s time for an upgrade.

Your Rate of Consumption Changes
A heater that serves a family of 2 may not be sufficient if the number of people in your household increases. In such a situation, you will need a new water heater with a larger capacity. Unfortunately, this is not a problem you can diagnose immediately but if hot water generally keeps running out, that’s as good a sign as any.
Taking on a DIY water heater replacement project saves you money. However, it would be remiss not to consider the safety issues involved. A poorly installed heater could result in fires, electrocution, among other dangers. Therefore, if you do not feel confident handling tools or if electric/gas repairs are not your strong suit, it is best to hire a professional to do the installation for you.
How to Install Water Heater
Installing a water heater is somewhat like a tire change: you need to first uninstall the old one before you can install the new one. The following is a step-by-step guide on how to navigate both stages of installation.
Uninstalling the Old Water Heater
1. Turn Off the Power/Gas Supply
Power supply to the water is a live electric circuit even if the heater is off. Ensure to turn it off in your circuit breaker to avoid getting electrocuted as you handle the heater.
Gas, on the other hand, is easily flammable and a gas leak is, therefore, an extremely hazardous situation. Turn off all the gas valves leading to the water heater before you begin.
2. Drain the Water in the Tank
Take the hose pipe and connect it to the drain valve of the water heater tank. The valve is usually located somewhere on the bottom part of the tank.
Connecting the hose will create a suction effect and could cause an airlock situation where the water drains slowly. To avoid this, open one of the hot water taps near the heater. This will balance off the suction.
Once that is done, open the drain valve slowly. Remember that sediment in a water tank gathers at the bottom which is where the drain valve is. If you open the drain valve at full throttle, sediment may clog the drain or the hose.
With the drain open, allow the water to flow out until there is none left.

3. Disconnect Electric or Gas Lines Connected to the Heater
Power or gas connections are usually located towards the top of the heater. Before you begin, confirm that you have shut off the power or connection to gas line. For an electric heater, you can verify that there is no more current flowing through any of the wires using a voltage tester. For gas, confirm the gas valve or gas valves are off and wait a few minutes as not all valves shut off immediately.
To disconnect electric wires:
- Remove the cover on the electrical panel to reveal the wires
- Unscrew the wires from the leads on the heater
- Mark the wires with tape so that you know what goes where when installing the new heater
Some gas tubes are rigid while others are flexible and attached to the main gas valve using bolts. Disconnection is often as easy as undoing the bolts.
4. Disconnecting Water Supply
Use a wrench to dislodge the water supply pipes from the water heater connectors. If you are forced to cut them, cut only as little as you need to. Overly short water supply tubes will make hooking up the replacement heater much harder.
5. Detach the Vent
This step is only relevant if you are uninstalling a gas water heater.
At the top of the heater, you will notice a vent pipe secured using screws. Take out the screws to release the pipe.
At this point, the water heater should be fully uninstalled. Cart it away carefully using a trolley or some help. Do not underestimate its weight or the hazards of it falling and shuttering.
Installing the New Water Heater

Out with the old, in with the new.
Tip: With the old water heater moved away, consider cleaning the area with a wet cloth and let it air-dry completely. Do not hose it down or start working with any water around. If you notice any rusty elements, consider replacing them too because they can malfunction or spread the corrosion onto the new heater.
1. Move the New Heater into Position
Ensure that the new water heater is positioned such that it is aligned with the power and water supply lines. It should also be upright and standing stably.
2. Install the T&P Valve
A Temperature and Pressure Valve is a valve that automatically opens when the pressure in the water tank is too high. This is important as without a T&P valve, the tank would explode.
Some heaters come with the T&P Valve already in place on the tank. With some heater models, the valve may be in the box and you will have to fix it yourself. Be sure to follow the instructions in the manual.
3. Connect Other Water Heater Fittings
Fittings may vary slightly based on the water model you chose. Follow the manufacturer’s instructions keenly and install all fittings as required.
4. Connect the Water Supply Lines
You will notice that there is a cold water inlet and a hot water outlet. You will need plastic-lined nipples to connect these outlets to the water supply tubes.
Begin by wrapping the threads on the nipples with plumber’s tape. Rotate the nipples into the outlets until they are tightly in place(use a wrench or a pair of channel-lock pliers). Connect the cold water pipe to the nipple on the cold water inlet and the hot water pipe to the nipple on the hot water outlet.
Tip: This process is straightforward if you have flexible water supply tubes as they are generally easier to handle. You never have to cut them and fixing them only requires bolts. If you have rigid tubes consider swapping them for flexible tubes.
5. Connect the Power or Gas Supply
Electric water heaters and gas water heaters require different methods of installation.
For an electric water heater installation:
- Secure the heater electrical cable into the wire connection panel
- Remember the circuit wires you labeled during the uninstalling? Connect them to the leads on the water heater using wire connectors as appropriate
- Replace the cover of the electrical connection panel when done
For a gas water heater installation:
- Connect the gas line to the burner of the gas water heater
- Make sure that the connection is well secured and that there are no leaks
- Connect the vent to the draft hood
Tip: As you connect wires or even pipes, some may be shorter or longer than required. This is why you need to have wires, tubes, as well as soldering and cutting tools. They make it easy to make the necessary adjustments as you go along.
6. Test Your Installation
When you have everything in place, go through the manual one more time to see if there is anything you missed. In essence, aside from the discharge tube, there should not be any hanging wires or tubes. If your set up matches the indicated water heater diagram, move on to testing as explained below.
- Open a hot water faucet in the kitchen or any area away from the heater
- At the water heater installation site, turn on the cold water supply to allow water to fill up in the water tank
- When the tank is full, water should flow out of the tap that you had turned on
That confirms that the water system is running properly. Now, test the heating.
- Turn the electric or gas supply back on
- Set the water heater thermostat to a desired temperature(120°F is recommended)
- Open a hot water tap after a short while after, if the water is nice and hot, congratulations, you likely did everything right
Factors That Cause Water Heaters to Malfunction and How to Avoid Them
Even with a flawless installation, water heaters can still malfunction. This can be frustrating because repairs and replacements are quite costly. Plus, cold showers are not always what they are cracked up to be.
So, here are some reasons why water heaters fail and what can you do to prevent such failures.
Wrong Heater Size
Take, for example, that you need 80 gallons of hot water in a day but your water heater only has a 40-gallon capacity. The heater will likely need to run double-time to keep up with your consumption. This puts a strain on the elements, and they are thus likely to overheat or get damaged so In enough.
Tip: Replace your water heater with a bigger capacity water heater.
Sediment
Sediment comprises mineral deposits and other particles that settle at the bottom of a water tank. This causes your water heater to consume more power and can also result in blockages.
Tip: Flush your water heater twice a year or every quarter if you have hard water; it usually has more sediment
Corrosive Fumes
Do you store bleach or other chemical agents near your heater? Make an effort to move them away. Heaters suck in air to facilitate combustion. Air that is tainted by chemical agents may react with elements in the water heater and cause corrosion.
Excessive Water Pressure
Too much water pressure strains water supply pipes and in severe cases, it can cause cracks in your water heater tank. It is best to always keep your water pressure at 80 psi.
Tip: Consider replacing your temperature and pressure relief valve.
Best Water Heater Recommendations
Different water heater models are suitable for different needs and preferences. You can learn more about how to choose the right one on our water heater buying guide.
Nonetheless, here are a few top picks that you can consider for your water heater replacement project.
1. Best Overall: Midea Non-Pump Water Heater MWH-38Q
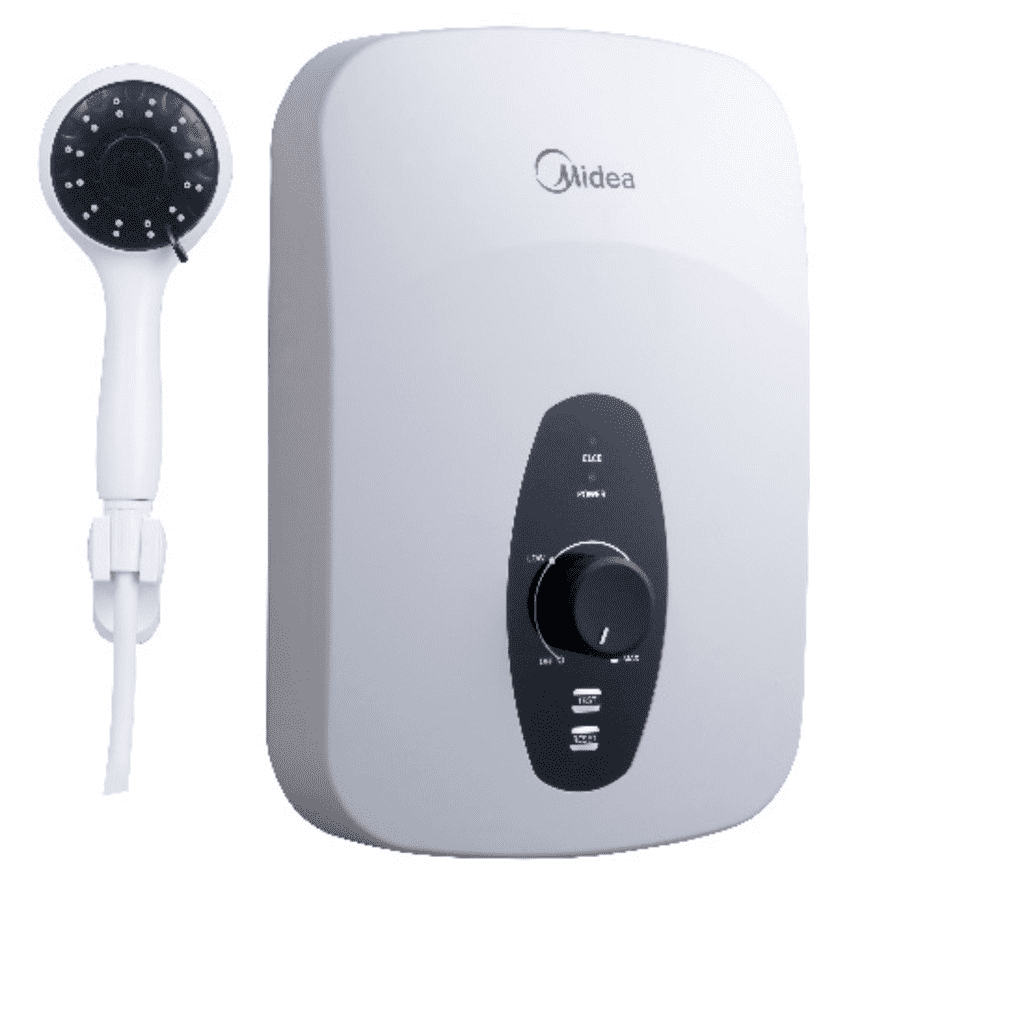
The Midea Non-pump Water Heater is an instant electric water heater. The water gets heated by electric elements when you turn on the heater. It is a sleek high-performing model that takes up little room and offers you toasty warm water on demand.
Pros:
It is splash-proof; it would not get damaged if water splashed onto it as you shower or clean
- It is easy to install
- It has an automatic cut-off system to prevent electric malfunctioning
Cons:
- It may not be suitable if your household has low water pressure
2. Best No-Pump: DEKA D50 Water Heater
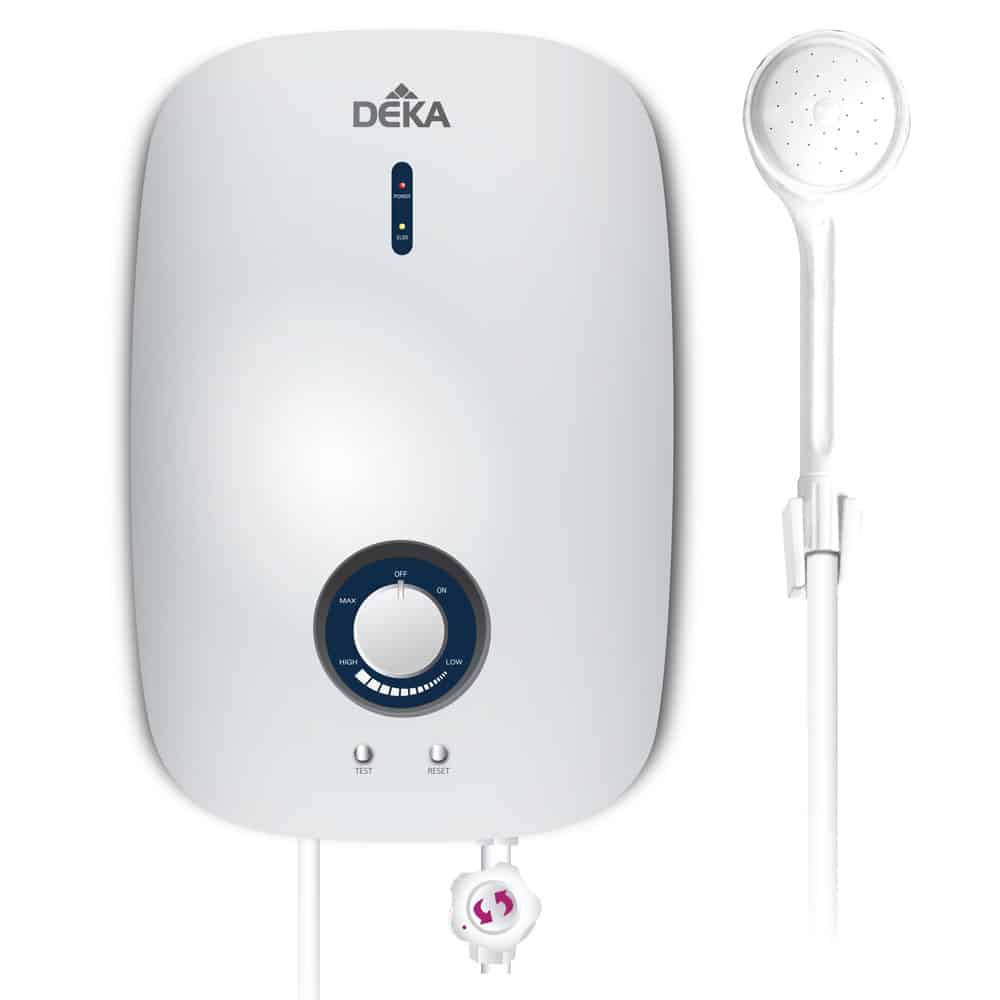
The DEKA Water Heater is also a no-pump instant electric water heater. While it only has a 1-liter water capacity, it has a fast-heating element that ensures you have a steady stream of hot water. It also offers you multiple heating settings.
Pros:
- It has an anti-scalding tank design with a double safety thermostat
- It is splash-proof and would get damaged by external water contact
- It has an automatic safety cut-off to prevent electrical faults
- Wall mounting is easy
Cons:
- It has a small tank capacity that may not be optimal for high-usage households
3. Best Safety Pump: Panasonic Instant R Series Water Heater DH-3RL1MW
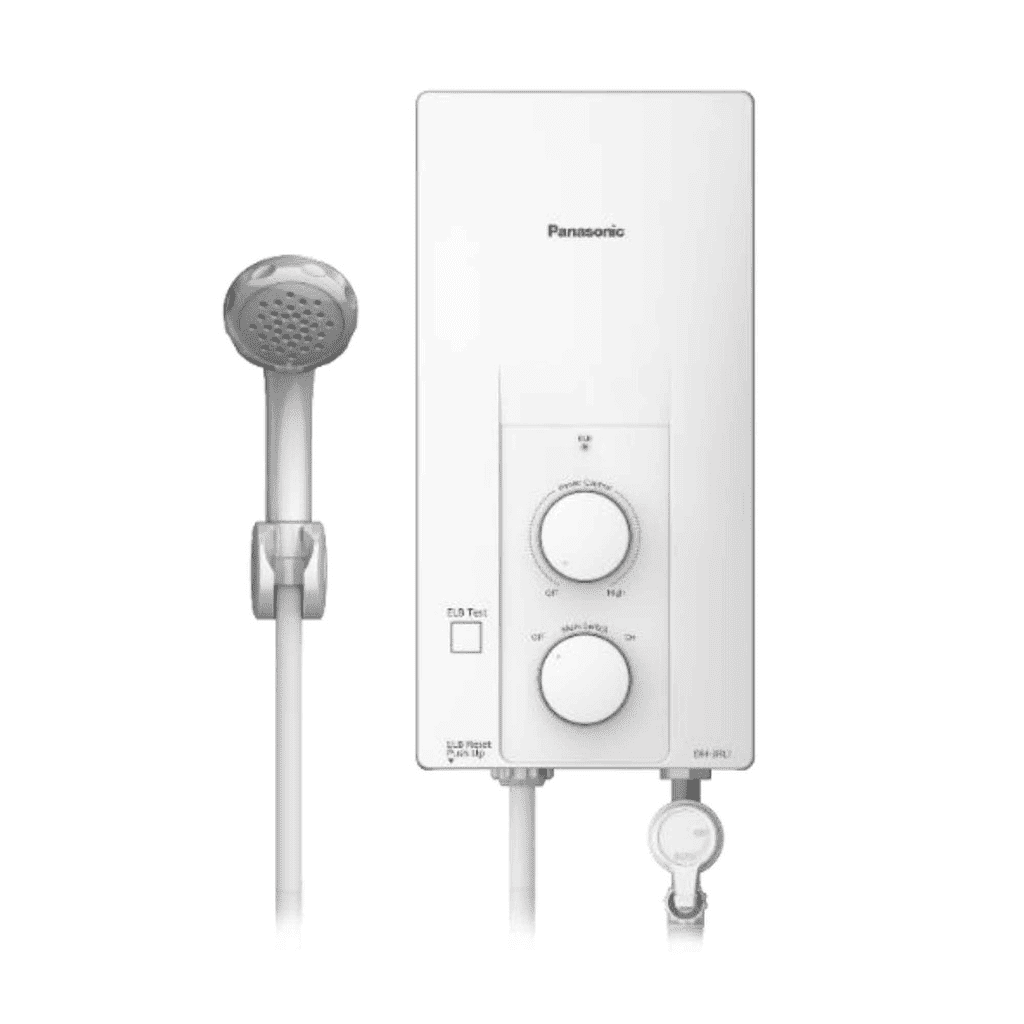
The Panasonic Instant R-Series Water Heater combines high-performance and unmatched safety features. Like other water heaters on this list, this electric water heater has an automatic safety cut-off but it offers much more. Its body is reinforced in polyamide which is non-combustible and it also has a cut-off that switches off the heater if water goes beyond a certain temperature.
Pros:
- Its flow sensor turns off the heater if water flow is too low
- It is splash-proof
- It has a built-in circuit breaker that cuts off power if there is electrical leakage to prevent electrocution
- It has a wide pressure limit range (9.8 to 380 kPa)
Cons:
- It is not ideal for low-pressure households
Final Word
With the right tools and clear guidance, replacing a water heater is not as daunting as it may seem. That said, do not bite off more than you can chew. Consult a professional for anything that you are not certain of or engage their services for parts of the installation you do not feel confident handling.
On choosing a replacement water heater, focus on your needs. However, if I had to narrow it down to just one water heater model, I would choose the Midea Non-pump Water Heater. It blends safety, convenience, and performance all in one. You can check it out here.